In today’s digital age, photo editing has become a key skill for anyone who enjoys capturing moments. Whether you’re a professional photographer or just someone who loves snapping selfies, having the right photo editing app on your iPhone can make a huge difference. To help you enhance your images effortlessly, we’ve compiled a list of the top five free photo editing apps for iOS.
—
1. Snapseed
Snapseed, developed by Google, is a powerful and versatile photo editing app that offers professional-grade tools for free. Its intuitive interface makes it suitable for both beginners and advanced users.
Key Features:
Precision editing with selective adjustments.
A wide range of filters, including vintage, drama, and grunge.
Healing tools to remove unwanted objects.
RAW photo editing support.
Why Choose Snapseed? It’s perfect for detailed and precise editing without the need for a steep learning curve.
—
2. VSCO
VSCO is not just a photo editing app; it’s also a creative community. Known for its minimalist design, it offers high-quality filters that give your photos a polished look.
Key Features:
A vast library of free presets.
Advanced editing tools like contrast, saturation, and grain adjustment.
Integration with a creative social platform.
Why Choose VSCO? VSCO is ideal for users who love artistic edits and want to connect with a like-minded community.
—
3. Adobe Photoshop Express
Adobe Photoshop Express is a streamlined version of Adobe’s flagship photo editing software. It’s packed with features tailored for quick and effective edits.
Key Features:
One-tap filters and corrections.
Tools to remove blemishes and red-eye.
Collage maker with multiple layout options.
Integration with Adobe Creative Cloud.
Why Choose Adobe Photoshop Express? If you’re familiar with Adobe’s ecosystem, this app offers a seamless experience for mobile editing.
—
4. Pixlr
Pixlr is a user-friendly app that offers a variety of editing tools and effects for free. Its simplicity makes it great for beginners who want to experiment with creative edits.
Key Features:
A variety of overlays and filters.
Collage maker for creating unique layouts.
Tools to crop, rotate, and fine-tune your images.
Support for layering and blending effects.
Why Choose Pixlr? It’s an excellent choice for casual edits and creative experimentation.
—
5. Canva
Although Canva is widely known for graphic design, its photo editing capabilities are top-notch. With a variety of pre-designed templates, it’s a go-to tool for social media enthusiasts.
Key Features:
Easy-to-use interface with drag-and-drop functionality.
Hundreds of templates for Instagram posts, stories, and more.
Basic editing tools like brightness, contrast, and cropping.
Ability to add text and graphics to your images.
Why Choose Canva? It’s perfect for users who want to combine photo editing with graphic design.
—
Conclusion The world of photo editing on iOS is vast and exciting. Whether you’re looking for professional-grade tools or quick fixes, these apps offer incredible features for free. Explore them and find the one that best fits your needs.
Pro Tip: For the best results, combine two or more apps to utilize their unique strengths. For example, you can edit colors in Snapseed and add creative text in Canva.
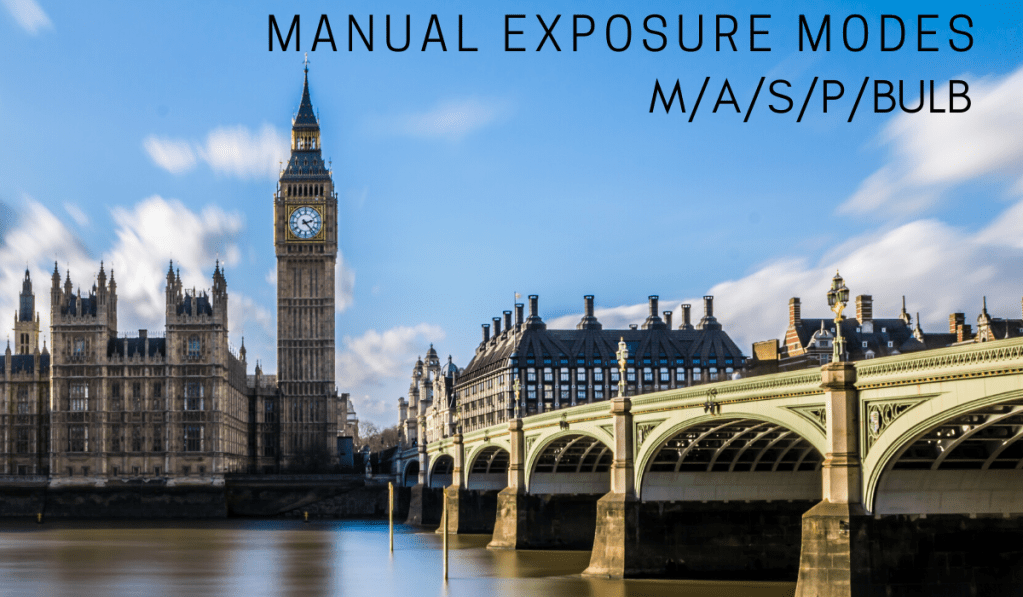
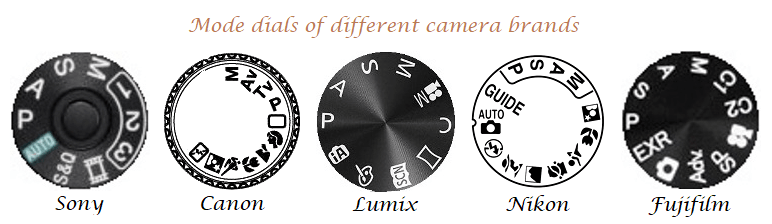
On most digital camera mode dials, you’ll find a variety of exposure modes, and are divided into two categories; one is preset modes like – sports, night, landscape, portrait, macro etc; other are the creative modes where the Exposure control is in your hand not on the camera.
Here will discuss about the four creative modes to control exposure as we want.
Aperture priority AE mode (Av)
Shutter priority AE mode (Tv)
Program AE mode (P)
Manual mode (M)
Aperture Priority (Av)
The aperture priority mode enables you to set the f-stop (aperture) and the camera will then automatically adjust the shutter speed to give the correct exposure. This mode is particularly useful in low-light conditions, where you want to set the brightest, widest f-stop in order to get the highest shutter speed and the minimum amount of movement. If more depth of field is needed, you can use a small f-stop to get as much of your picture in focus as possible.
Shutter Priority (Tv)
Using the shutter priority mode, you can set the shutter speed, and the camera will automatically selects the f-stop (aperture) to give the correct exposure. This can be especially useful when you’re shooting action pictures and you want to freeze the motion by setting a high shutter speed. By the same way, if you were photographing a waterfall and you wanted the water to blur, you could set a slow shutter speed and the aperture would adjust accordingly.
Note: These both modes Av and Tv assume that you have enough light to expose your pictures within the range of shutter speeds and apertures you’re using. And if you are not having very proper light or a wide aperture lens then you will have to master the Manual mode and take control of every parameter in your hand.
Program (P)
This setting leaves all the decision-making to the camera. The camera sets a combination of shutter speed and aperture so you don’t have to think about exposure at all. The other fine tune settings are still in your hand but this is moreover an Auto mode from creative zone of mode dial.
In some cameras this may be set up as subject programs such as “portrait,” “sports,” or “landscape.” If there’s not enough (or too much) light to achieve the effect you want then your camera won’t be able to work miracles on this mode. Even on this setting, check the LCD to make sure you are getting the images you want. And remember that you can still use auto exposure compensation to override the camera’s decision.
Manual (M)
This mode allows you to manually set the shutter speed and the aperture independently of each other, referring either to the camera’s built-in exposure meter or to a handheld exposure meter. Professionals prefer to use manual exposure and handheld light meters. Once you will start playing with this mode, you will also enjoy this mode to make some creative photographs. This allows you to take multiple meter readings in various points of the subject frame. In this method the photographer has total control over the pictorial effects that various shutter speed and aperture combinations can achieve. When film was dominant, this method tended to be the exclusive to the professionals or the advanced amateur.
Auto Bracket Settings
Today, the immediate results of digital photography allows you to shoot test frame, have a look, make various adjustment to fine tune the final output and get the right exposure. Most advanced D-SLR cameras have an auto-bracket setting or the HDR(High Dynamic Range) settings. This clever little feature sets the camera to take three pictures automatically, in rapid succession: one at the “correct exposure,” one overexposed, and one underexposed. I find this very useful when working quickly because I know it will give me a choice of exposures after the fact. By setting the camera to shoot one picture at the “correct” exposure—as the camera sees it—and two frames perhaps one f-stop either side, I’ll always end up with one frame that I consider to be the perfect exposure. You can change the increments of the brackets so that they are 1/3, 1/2, or 2/3 stop to either side of the “correct” exposure, depending on the camera model. On most cameras this facility works on all the automatic settings and in manual mode.
Exposure Compensation
If you find that your images consistently look better by underexposing by one stop, or by overexposing by half a stop, then use the exposure compensation setting to build this factor into the camera’s light metering. This you will come to know when you analyse your pictures on the computer screen that your all the images are over-exposed or under-exposed. So, accordingly you can cheat with the camera’s light meter to get your perfect exposure.
This facility enables you to under- or overexpose by up to three f-stops or full shutter speeds. This is normally indicated on your camera by a scale from +3 to -3 with one/third stop increments. Most professional photographers I know use the exposure compensation feature to fine-tune the camera’s light meter. When you have time and the subject permits, vary your exposures so you don’t miss an important shot. Check the images on your computer screen and delete all the bad ones before you show anyone your work.
In the last post we came to know about What is right exposure and the factors affecting the exposure of a picture. To register a perfect tone image on your digital camera sensor, one must allow the correct amount of light to reach the digital sensor. The three factors that control the path of light are sensor sensitivity (ISO), shutter speed(SS), and aperture(f-stop).
When the film photography was dominant, exposure was an really important subject. The digital era has brought us light-years forward because we can now see the result instantly. Just as with film cameras, the DSLR takes into account the brightness of the frame, the contrast, the color of the picture and the area in focused. When automatic exposure is set, the camera calculates all the settings accordingly and much more instantly.
You can now review your pictures immediately after exposing, on the LCD screen on the back of your digital camera. If you are a beginner to photography, there are many other different aspects that have to be considered before you take each picture. How do I compose the picture? Is it in focus or not? What should be the background? Until all these elements start to become second nature, it’s good to keep your camera on auto-exposure. This will give you one less thing to worry about while you concentrate on all the others parameters. Then gradually, as you become more technically strong and have learned to hold the camera the right way, you’ll start to adjusting the small adjustments that are possible on your camera to get a perfect exposure as per your learning and experience.
On most of the DSLRs and high-end compact digital cameras, you have the option of setting the exposure manually(M-mode). This is time where we begin to play with the camera’s settings to get perfect exposure. Moreover we now start overexposing and underexposing the photograph as per our need.
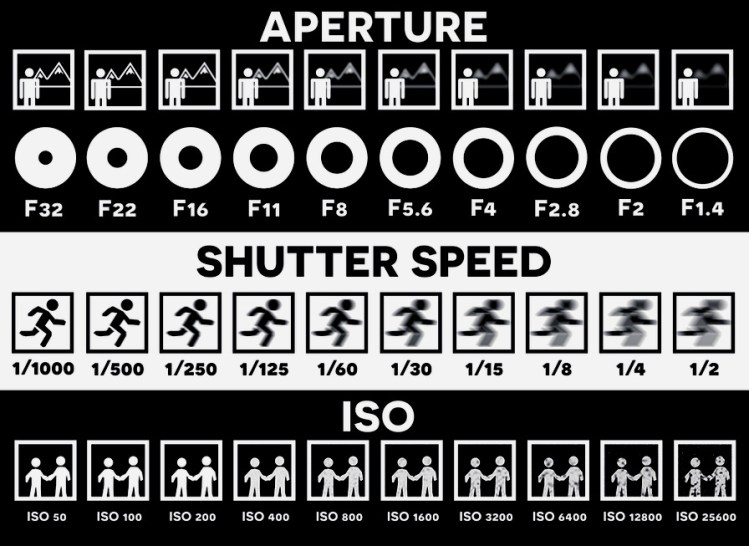
Camera Sensor Sensitivity(ISO)
In Film photography you need to change films if you want to change the ISO. Eg. If you are shooting at ISO100 film and suddenly the weather changed now you need ISO400 to get your desired image, So you need to change the other film of ISO400.
On the other hand in Digital photography, DSLR allows you to shoot a group of pictures, or even a single picture, at one ISO setting, then change the ISO setting on the same memory card and keep shooting. You can change the ISO as many times as you need.
Shutter speeds(SS)
Here are some basics about shutter speeds to begin with:
• If the light is really bad, try not to go below 1/60 second. If you must, hold your camera very still and don’t expect to freeze any action.
• For everyday pictures such as portraits and views, use speeds of 1/60 second to 1/250 second.
• To stop a racing car, or someone riding a bicycle, start with 1/1000 second.
NOTE: To avoid the camera shake, your shutter speed should not be less than the focal length of the lens you are shooting with.
Aperture (f-stop)
Here are some basics about Aperture/f-stops to begin with:
• As a general rule, f/5.6 gives a little bit of depth of field, provided the lens focal length isn’t too long, and is still wide enough to enable high shutter speeds.
• If it gets really dark, don’t be afraid to open your aperture to its maximum available aperture, for example, f/1.2 or f/1.8.
• If you need loads of depth of field, or you want a slow shutter speed, stop down to f/11 (when using a short lens) or f/16.
If your picture looks a little bit lighter or darker than it should, take another parameter to adjust the exposure. You can make your image lighter by increasing your exposure, or darker by decreasing the same. NOTE: f/8 can be used as a universal aperture perfect for any genre of photography.
Note: Your most of the lens usually gives the best sharpness at one stop down to the widest aperture available at your lens.eg. Lens with f/1.8 will give its best sharpness at f/2.8 not at f/1.8. anyone can experiment this and visualize the difference.
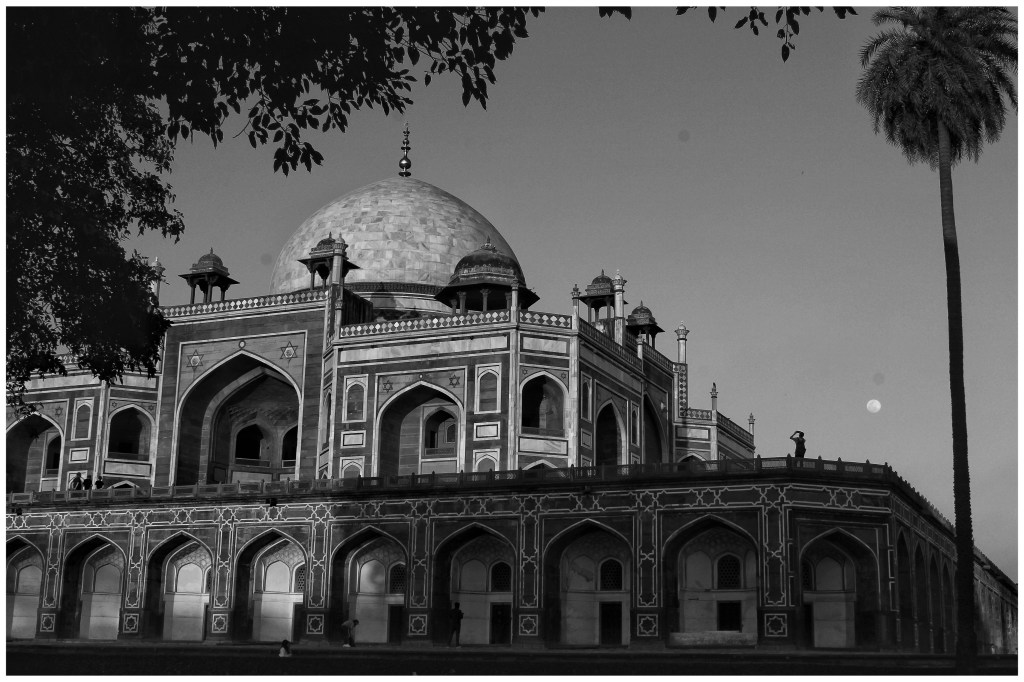
Before giving the correct exposure to your pictures it is important to know what a correctly exposed image looks like. A correctly exposed digital picture is a file that shows a full range of tones, from deep shadows to bright highlights, with details across the entire image and all the tones.
One should be able to see some detail in the dark shadow areas while at the same time retaining detail in the brighter highlight areas. Providing you get this, you can decide later whether you actually want the full tonal range to appear when you print/publish the image or not. If you could not ensure that you have the full tonal range while shooting, there is little you can do about it later in some photo editing software.
The picture with the shadows can be fine-tuned to great extent but once if the picture with more highlights or burns the details can’t be recovered from the same.
This last point is more crucial when shooting in JPEG format. When shooting in RAW mode, getting the right exposure is a more easier process than it is when you shoot color negative film because you can correct the color in your computer later.
If you shoots RAW then it’s easy for your to correct the image’s White Balance, Brightness, Contrast, Sharpness, Color Balance, Exposure and many more parameters. Whereas JPEG gives less freedom to play with all the above parameters.
Now, we will explain some terms being used in photography & you will need to know. Then we can learn in greater detail about each one.
Exposure is the amount of light, controlled by aperture and shutter speed, that reaches the image sensor. Now ISO is also added to control the sensitivity of light.
Shutter Speeds is the measure of the duration or length of time that the shutter stays open. The longer the shutter stays open, the more light will be allowed to reach the image sensor.
Faster shutter speeds freeze the action and usually require more light and a larger aperture (smaller f-stop number).
Slower shutter speeds enable pictures to be taken in lower light with a smaller aperture (larger f-stop number).
Aperture or F-stops are the measure of the size of the opening, or aperture, in the lens. Remember, the larger the f-stop number, the smaller the aperture and lesser light to the sensor.
The smaller the f-stop number, the larger the aperture and the more light the lens will let through to the image sensor.
ISO – Camera Sensor Sensitivity. Earlier in the negative film the term ASA(American Standards Association) was used which was changed to ISO(International Organization for Standardization) later in 1987.
ISO helps camera image sensor to become more sensitive to light with increasing ISO range. Usually it starts from 100 and go up to 12,800. But now a days in some high end Cameras it starts from as low as 50 and can go upto 3million, which is required and helpful for low light conditions only. Generally a photographer uses from 100-1600 ISO range only.
One more fact to add is, the lower the ISO the better the quality of photograph in terms of noise and details. And higher the ISO the more will be the noise in the photographs with less amount of fine details.
So, keep on experimenting and improve your photography. If you like the post then follow us on Instagram, Twitter, Facebook.
Being a photographer you need some mobile applications which can provide you the freedom of editing like a professional. Earlier it was only possible in a professional computers with pro level editing software which were paid. But now with changing time and improving technology, the professional grade editing of images is possible on your mobile phone and without even spending a single penny. Yes, the apps which we are going to discuss about are free to download and use. There might be some in-app purchases which hardly require. So, there is the details about the apps you need and can use as per your requirements.
Snapseed By Google LLC
Snapseed is a totally free app with very pro level editing tools, including every parameter from brightness/contrast to levels and HDR scape. Snapseed provides a number of presets also. We can adjust depth of field, perspective and even canvas size of any image. There are a lot of tutorials within the app with which you can learn a lot and can apply the same option to other photos as well. You can Open/Edit one photo at a time. Once the changes you have saved that can not be undone if you have closed the image or clicked done. Snapseed provides a very unique feature of masking with any adjustment layer you want to apply on. Snapseed itself is a complete package for professional grade editing in your mobile phone and its totally free.
Android Snapseed will edit DNG RAW files on any device that can capture DNG, And iOS Snapseed will edit RAW files from a no. of devices.
This app is available for both the platforms Andriod and iOS (iPhone/iPad).
Adobe Photoshop Express by Adobe
Adobe Photoshop Express:Photo Editor Collage Maker is again a totally free app which provide all the professional grade photo editing tools. Photoshop Express delivers a full spectrum of tools and effects at your fingertips. Personalize your experiences with sticker makers, enhance color gradients and imagery, create pic collages, generate memes, make quick fixes and heighten your share-worthy moments. Features like Perspective Correction, Noise Reduction, Blur, Customize images with the sticker maker, create memes and captions, style your text with a wide array of fonts and layouts, add borders and frames, and stamp creations with custom watermarks. Dehaze pictures to remove fog in a scene, apply dramatic filters for pictures, and easily slide to adjust color temperature, vibrance and other color effects. Making picture collages, spot healing and automatically adjust contrast, exposure and more with one-touch adjustments; easily crop, straighten, rotate for eye-catching layouts, and magically remove red-eye and pet-eye from your favorite moments. Upload images from multiple sources and formats (including raw and TIFF), posting your favorites directly to Facebook, Instagram, Twitter, Flickr and other social platforms or share them in email, WhatsApp, Facebook Messenger, and Line to inspire others.
This app is available for both the platforms Andriod and iOS (iPhone/iPad).
PicsArt Photo Editor by PicsArt
PicsArt Photo Editor is home to the hugely popular sketch effect, glitch effect, vintage filters, aesthetic stickers, and more. AND it’s FREE (In-app Purchase or Upgrade option available) Show off your awesome pictures on Instagram with #picsart and you might be featured!
Provides amazing tools for cropping, stretching, and cloning. A full library of artistic photo filters (including HDR), frames, backgrounds, and borders. Use brush mode for fine-tuning and make double exposures using layers with adjustable transparency. 100+ fonts. Some of our coolest photo features are now enabled for video. Bring your unique story to life by adding fun filters and stickers, then adjusting the size for social media. No professional experience required! Take any selfie and create asketch that looks hand drawn. PicsArt’s Gold subscription gives you access to many more premium stickers, fonts, frames, collages and masks. PicsArt’s Cutout Tool lets you create and share custom Stickers out of any picture. PicsArt Draw includes customizable brushes, layers, and professional drawing tools. PicsArt’s Challenges are fun and easy! New challenges, added daily, are a great way to find inspiration.
This app is available for both the platforms Andriod and iOS (iPhone/iPad).
Pixlr by 123rf Limited
Pixlr (formerly Pixlr Express) is a free and easy photo editor. No account creation required, just download and start editing. Show your awesome edits, #madewithpixlr for a chance to be featured on Instagram. Create photo collages, adjust the color, make pencil sketch, poster, watercolor and more. Double Exposure to create an array of effects easily with layers and adjustable transparency. Remove blemishes, red-eye, smoothen skin, or whiten teeth with simple tools. Adjust the tone of the photo with overlays – amplify the tone, cool it down, or add surreal shades. Add text to your photos with a variety of fonts, choose borders. Keep track of your favourite effects and overlays with the favourite button. Crop and resize images quickly and easily before saving. This app is available for both the platforms Andriod and iOS (iPhone/iPad).
Fotor by Everimaging Limited
Fotor is an all-in-one photo editing and image licensing platform where amateur and professional photographers can monetize on their shots through Fotor “Events”. Gain exposure and be rewarded with Events, introducing weekly photo contests hosted by Fotor. Fotor allows the enthusiast of all levels the opportunity to win prizes, profits and fame.
Fotor photo editor enables an easy-to-use while professional image processing experience. A massive range of updated Photo effects and filters, allowing you to simulate an almost unlimited number of styles, including: Film, Vintage, B&W, Kaleidoscope, etc. Up to 10 completely customizable ‘Edit’ functions, Fotor photo editor allows you to all forms of editing, from minute ‘touch ups’ to extensive images changes. The ‘Enhance’ function, complete with ‘slide on screen’ capability, allows for rapid adjustments in in details and gradation. Different photo collage template styles such as Classic & Magazine collage templates, making your images into art by collage way. Regular updates for stickers, borders for pictures, photo stitch, photo frames, photo filters and fonts will ensure a fresh new design for every day.
Licensing your photos to PxBee which is a stock photo marketplace connecting the creative community of Fotor. Join PxBee and start making money through your photos. Providing breathtaking photographs, licensed for use in multiple projects such as web design, printed materials and commercial displays. This app is available for both the platforms Andriod and iOS (iPhone/iPad).
Photo Editor Pro by InShot Inc.
Photo Editor Pro offers everything you want to edit pictures. A host of stylish effects, filters, grids and draw tools help you create an eye-catcher, even if you’ve never edited a photo before. With Photo Editor Pro, you can directly post your artworks to Instagram, Whatsapp, Facebook etc. Filters like Lomo, PINK, Vignette, Natural, Warm, Dew, Dark, Cocoa…Adjust brightness, contrast, saturation, hue, warmth etc. Glitch Effects & Blur Background, Photo Blender & Light FX, Body Retouch, Photo Collage Maker, Highlight and shadow, and many more to edit. This is a complete package of editing tools you can play with. So download and start editing and sharing some wonderful edits.
Photo Editor, Filters & Effects, Presets – Lumii by InShot Inc.
Lumii, as a powerful photo editor pro, values simplicity and practicality the most. Just simple and fast touches, you can create artistic high quality works without any professional skills. It offers all the advanced photo editor tools and amazing preset photo filters and photo effects to edit pictures, enhance images. No matter you are a newbie or pro, Lumii will be your best edit pictures app among plenty of similar photo maker and presets apps. Apply perfect presets for Instagram and filters for pictures to fill your aesthetic needs. Lumii is Free and all-in-one Photo Editor App.
Lumii features Customize Photo Filters, Customize Photo Effects – such as Glitch, Light Leak, Double Exposure, adjustment for photo effects strength, HSL Color Mode, supports 8 colors channels, Powerful curves tools.
Adjust brightness, contrast, highlights, warmth, shadows, sharpness, exposure, image enhancement, crop photo freely (in multi aspect ratios), add text on photo. Lumii helps you become an expert in photo editing, especially in photo filters and effects adjustment, and discover endless fun during the time. The app is available for Android only.
This was all about free pro level photo editing app, We hope this helps you a lot to choose the perfect image editing app that suits your style. These are not fancy apps, these provide all the tools which are very useful for photographers.
If you like the information then follow our blog and comment for your choice of topic in the comment box. Follow us on Instagram.
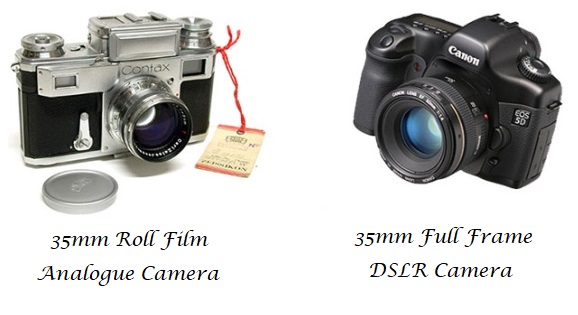
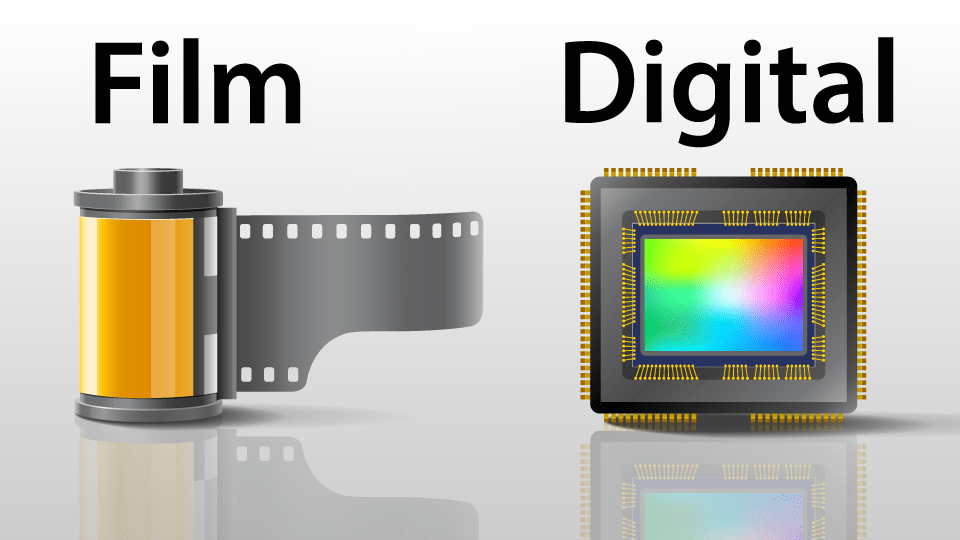
A way long, the whole concept of photography has changed drastically. The whole system of negative roll has been taken over by the digital era. Here we will discuss about what has changed and what not.
Starting with the concept of photography, the basics are still the same. The whole photography techniques moved around the Aperture, Shutter and ISO. The things which changed from analogue to digital is the medium at which the photo is being captured i.e Negative rolls or Glass Plates to Electronic Sensors.
Earlier the Negatives of different size were available so as CMOS sensor now. Very common size of negative used and familiar to the general public is 35mm(24x36mm) negative film and the maximum size available known to professionals only were “20inches x 24 inches”, In between there were many different size of negatives available in past – 4x4cm, 4x6cm also called 120mm film, 5x7inches glass plates.
Now, for the same work DSLR Camera or any electronic camera have CCD/CMOS Sensors on which the image is captured. These sensors are also of different sizes and consists of a smaller unit called pixels, the more the pixels the more will be the details in the photograph. Each Pixel is made up of 3 color bars – Red, Green, Blue.
The Camera which have a sensor size equivalent to 35mm is categorised as a Full Frame Camera, and the camera those have a sensor size less than a full frame is known as Crop Frame Camera. There are 100s of camera models available from different brands with Crop Frame Sensor. There are limited no. of Full Frame Cameras which are now ruling the market from different brands. The Full frame camera comes under the Professional camera from each brand and are most used for photography purpose. There are now hybrid camera available in the market which offer both the operations of making video and capturing photos with professional settings and output.
The Electronic sensor available of maximum size in some commercial camera is 8×10 inch in LargeSense LS911 Camera.
Focussing System
The Focussing system has also been changed from manual to very fast & automatic. Earlier the focus and aperture settings were manually set from the different rings present on lens. Now the whole focussing system is converted to electronic and automatic system which gave a revolution in photography by giving birth to so many categories of photography specially where fast focus was necessary eg. sports photography, Wildlife photography. With Fast and Automatic focus system we are now able to capture any subject with more precise focus results in more sharp and detailed images.
Although the 35mm negative film was having a resolution equivalent to approx 40 megapixels of electronic image. So the details we also good in the analogue photography also, the only thing changed is lens are now more precise and fast.
Image stabilization
With the electronic era one more concept came into trend i.e. Image Stabilization/Vibration Reduction. This is the method through which the camera shake can be adjusted upto an extent. Now some lens are able to handle that upto 5stops Image Stablilization which means with this option if you are are to shoot a picture at a SS-1/2000 then you are now able to click the same with image stabilization ON at SS-1/60 also, the image will not have a shake in the final result. The Image Stabilization works for the Camera shake reduction not for the subject movement blurs or shakes. Most of the Zoom Lens coming into the market are generally having at least 1 or 2 stop of image stabilization.
Aperture
Earlier in analogue photography cameras the widest available aperture was 2.5 or nearby, but now a days in the electronic era, there are lens available in the market with an aperture of 1.1 as well.
Speed of Camera
The image taking capability of the cameras has drastically changed as of now the DSLR camera can shoot photos at upto 20 frames per second or more on continuously shooting the images.
So, this was all about the differences came in the equipments from Analogue to Digital Era. There is a lot more in detail.
For your queried you can ask your questions and follow/subscribe the blog to stay updated about the latest posts.
First of all we will understand the concept of focal length of a lens. Focal Length is the distance between the focal plane(Image Sensor) & focal point of lens.
Lower the focal length = more area captured by lens
Higher focal length = less area captured by lens
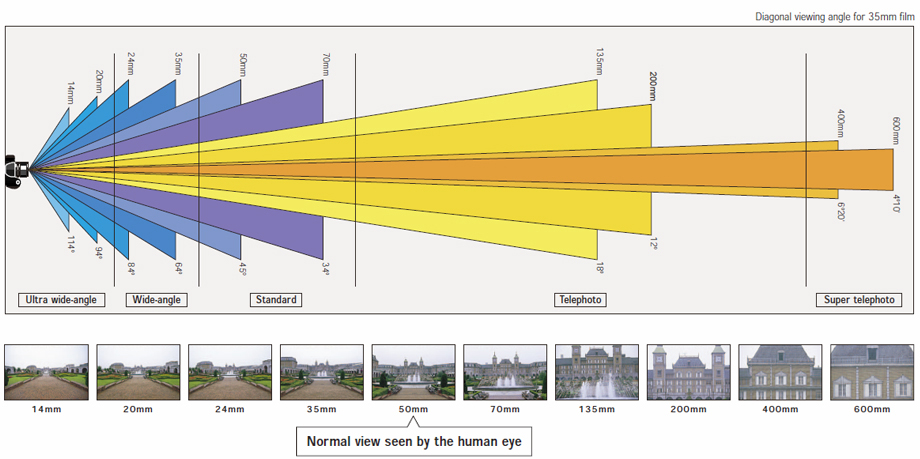
On the basis of viewing angle there are three types of lenses
Normal lens = 50mm (equivalent to normal human eye)
Wide Lens = any focal length less than 50mm. e.g. 14mm, 24mm, 35mm etc
Tele Lens = any focal length greater than 50mm. e.g. 85mm, 100mm, 135mm, 1200mm and more
On the basis of working of lens these are categorised into two types. Zoom Lens And Prime lens.
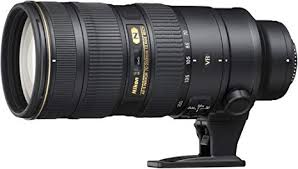
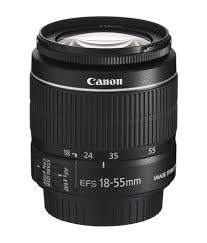
Zoom Lens
Nikon 70-200mm lens Canon 18-55 lens
Zoom Lens are the lens which have a “range” of focal length. These lens covers a variety of focal length and image can be zoomed in or out before capturing. These lens gives freedom to the photographer to capture at any available focal length without moving from his place. These are further divided into three classes. Wide to Wide, Wide to Tele and Tele to Tele.
Wide to wide zoom lens cover both the focal length in wide angle segment only. These lens are best suitable for shooting Landscapes or wherever we need a wide angle view. e.g. Canon 17-40mm(Full Frame), Canon 10-18mm(Crop Frame), 18-55mm(Crop Frame), Nikon 16-35mm and many more.
Wide to Tele zoom lens are very useful and popular ones because they give complete ease to shoot daily life images or covers almost the need of all photographers genre(Wedding, Portraits, Landscapes, Journalism etc.). These lens have a range from wide to tele angle. eg. Nikon 18-200mm, Canon 24-105mm, Nikon 24-120mm etc.
Tele to Tele zoom lens are useful in wildlife photography and astronomical photography only. These are a bit expensive lens and are used by professionals usually. eg. Canon 100-400mm, Tamron 150-600mm, Nikon 70-300mm etc. Some with lower tele focal lengths are used for Portraits, Journalism, Event photography also. eg. 70-200mm is very popular lens from various brands. and other are 55-250mm, 55-200mm.
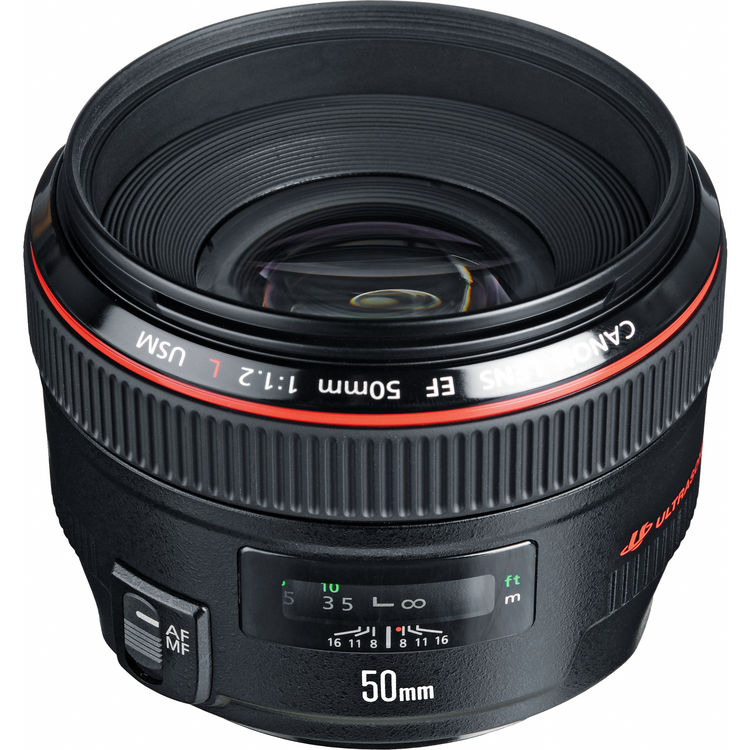
Prime lens
Prime lens are the lenses which have a fix focal length. the most commonly used prime lens is 50mm f1.8. This is the best lens to start with. This lens is available from most of the brands in the market. The cheapest one is available from a Camera brand is Canon 50mm 1.8 rest all the camera manufacturing brands provides the 50mm 1.8 of their brand is priced high than the later. Some more cheaper one are also available form third party lens brand. There is no compromise in the quality of these lens from several brands but the only thing make them low priced or high priced is the no. of consumers for a particular brand. There and wide and tele prime lenses are also available in the market. eg. nikon 20mm, 25mm, Canon 14mm, 24mm, 35mm, 100mm, 135mm, 800mm and 1200mm. Any of the prime lens does not have any zoom function. These lenses are fast focussing lens. Their result in terms of quality and depth are also better than the zoom lens.
Canon 50mm 1.4
There are two special type of prime lens which we will discuss about are Fish-Eye lens and Tilt-Shift lens.
Fish-eye lens named so because their front element look like a fish eye and these covers an angle of around 180 deg like a fish eye. These are also called the ultra-wide angle lens. eg. Canon 15mm. Most of these are prime lenses, but some brand have zoom function in these lens also. eg. Canon 8-15mm,
Canon 8-15mm Zoom Fish Eye Lens
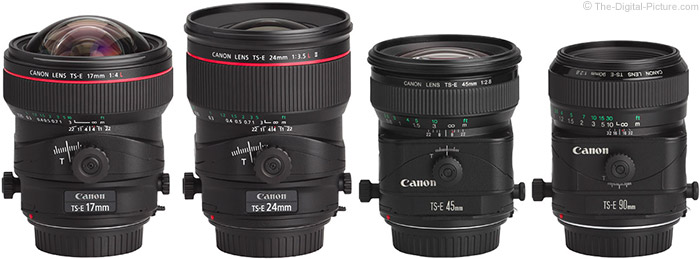
Tilt-shift lens are very useful in product photography, Archival Photography, Corporate Building Shoots etc. as they can avoid the reflections coming into/from the glossy surfaces of the products and can change the perspective of a monument or building. These lens changes the view of upto 8-9 degree angle which is sufficient enough to avoid the reflections and shoot the desired image. eg. Canon 17mm, 50mm, 90mm etc.
Canon Range of Tilt-shift Prime lens
However, the things which make prime lens better than any other lens are fast focussing system, better photo quality, better depth of field control and mainly the Aperture. Wider the Aperture opening better the lens as it allow more light to come in, better for low light conditions. So, one before purchasing a Prime lens should go for the lowest f/no. lens fits into budget.
Roll Film Cameras are basically categorized into 4 types depending on their need and working.
Box Camera
Folding Camera
Reflex Camera
Miniature Camera
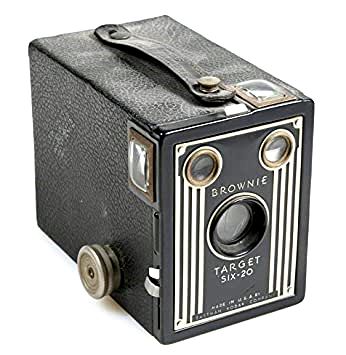
1. Box Camera
This is the simplest form of camera, with a lens and two viewfinders to view the portrait and landscape mode separately. These camera came with very few shutter and aperture settings.
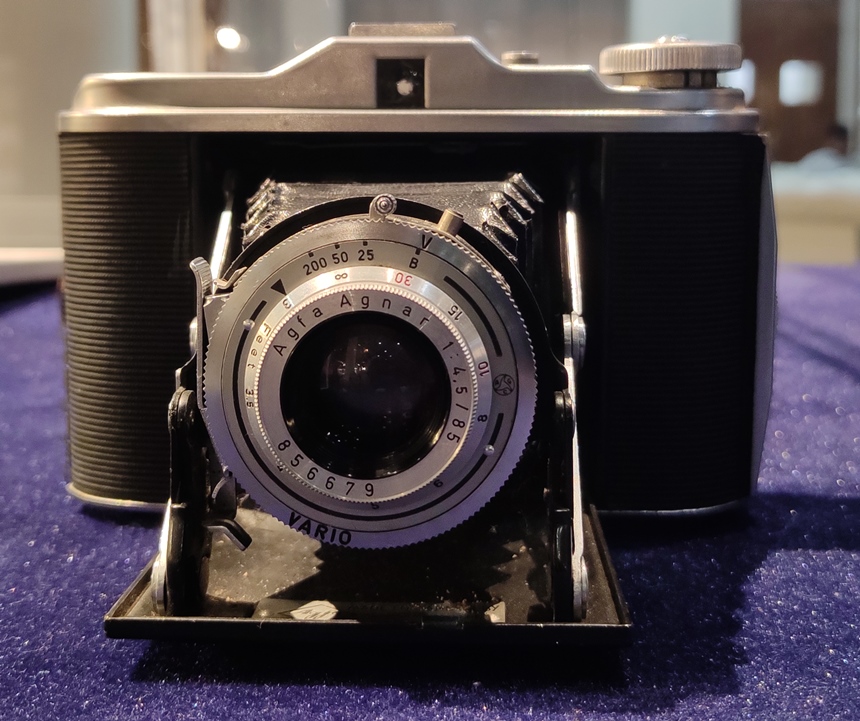
2. Folding Camera
These were also the most prevail camera of their time because of the quality and portability they offer. In this type of camera the Lens the the film chamber was connected through a bellow. These camera have compound lens and have a no. of aperture and shutter settings. Their negative or image making medium was as large as 20″ x 24″ negatives or as small as a 35mm film. So, this kind of model is being used for making any size of camera, these camera were used for making photos for big prints also.
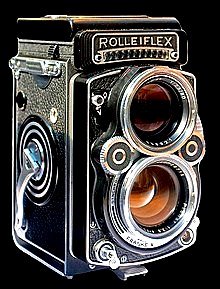
3. Reflex Camera
This is a TLR camera. As its name defines that Twin Lens Reflex Camera consist of two lens of same focal length, upper one to view from the viewfinder and lower one to capture the image on the film. These camera were remain in trend for long time and gave birth to Candid photography, which was very easy with TLR Camera as subject was not much aware of the camera. These camera were remain in trend for a long time.
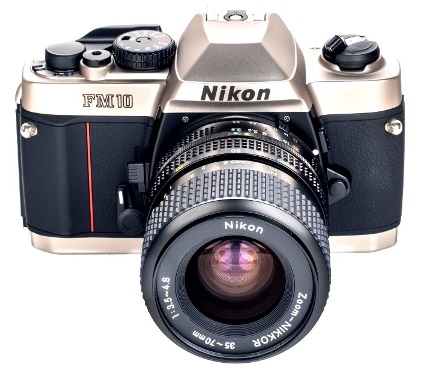
This is a SLR camera. As its name defines that Single Lens Reflex Camera in which the same and the only lens is used to view through the optical view finder and to capture the image on negative film. These camera have more customization of Aperture and shutter speed so used for a long time by professional photographers. The above camera was the latest launched negative camera when digital camera era was started. This Camera lens can be changed as per requirements. These Camera have advanced Shutter and aperture system.
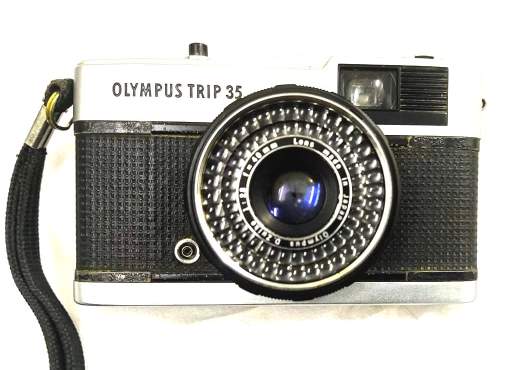
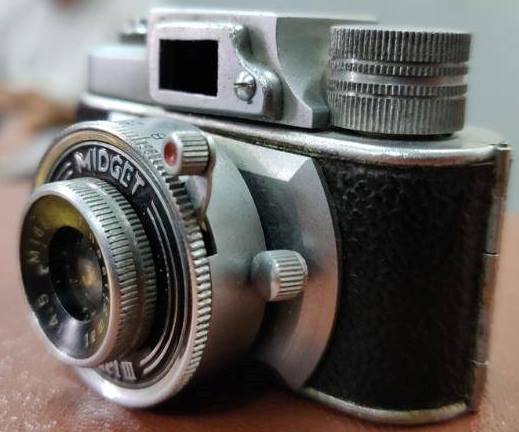
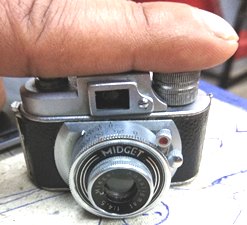
4. Miniature Camera
Miniature camera were the cameras in which the 35mm film is used are called miniature because in the roll film era the 35mm film was very small/miniature as compared to other film and plate size. These were also called the rangefinder camera, Small in size and easy to use just point and shoot. These camera were famous among the hobbyists as there were almost no setting to customize just look into the camera, focus and shoot.
Miniature Spy CameraIts Size is the 2/3rd of a normal human finger.
These are the spy camera, comes under the miniature category too. these were also having the negative to shoot the image and having a very small sized film rolls but were excellent for spying work and this camera has easy access to any security area as well.
Now as you are well known to the history of photography and basic functions of the camera, you can now start capturing stunning images by using your DSLR or a point & shoot or with just a Mobile Camera. So just take out your camera and start capturing with whatever mode of camera u like, with Creative or Auto or Preset modes.
Auto – In this mode camera optimizes all the functions as per its software guide. No setting can be done manually. Flash will auto fire if needed.
Preset Scene – There are various preset scene modes with which you can directly set the mode to the desired preset and click the image better than that of full auto mode. eg. – Portrait, Landscape, Macro, Sports, Night, Night landscape and Flash off mode.
M/Av/Tv/P – This is the Creative zone of photography, Most of the stunning images are taken in this part of Mode dial. In M-Manual mode the Camera leaves its total control on a photographer. Any setting can be customized in Manual Mode.
Manual Modes Explained
P Mode – In this mode Shutter, Aperture and ISO will be automatically set by camera software as per scene requirement. And rest other Settings like White Balance, Metering, Picture style, Auto Focus functions can be customized.
Tv or S Mode – In this mode along with all other settings Shutter speed can be customized, Aperture and ISO will work automatically. We just need to set the shutter speed as per requirement.
Av or A Mode – In this mode along with all other settings Aperture can be customized, Shutter speed and ISO will work automatically. We just need to set the Aperture as per requirement
M Mode – Manual mode is the real creative mode as all the settings can be customized in this mode and we can get the desired results as we want. all the creative photography and professional photography is done with this mode only. Photographer have all the control in hand to get the desired result or to manipulate the exposure as per his artistic vision. Once you will understand to operate this mode, you will never leave it again or set the dial to any other mode. The Mastery of photography begins here…
‘Photo’ means “Light” & ‘Graphy’ means “Writing or Drawing”, So, ‘Photography’ means “Writing or Drawing with Light”.
Photography is an art form in which light is a medium through which an artist can paint on canvas of roll film or an electronic sensor. With a light tight box photographs can be taken if this box has a lens, Shutter and a film chamber {used to place a light sensitive material on which image is formed}. These three parts are called the principal parts of a camera.
Camera Obscura – dark room with a pin hole, this is the simplest form and the basic principle of a camera and generating image.
Aperture, Shutter & ISO
These three factors are the main form factor of a photograph. In other words the exposure of a photograph is controlled with these three – aperture, shutter & ISO.
Aperture is basically the opening in the lens through which light reaches to the medium(negative roll frame). Aperture is denoted by “f no.” which is denoted by 1:(f no.). eg. we have a 50mm lens with f no. 1.8 then it will be denoted on lens as “1 : 1.8”. The Larger the f no. the smaller the opening, and smaller the f.no. the larger the opening. Aperture at f 1.2 has the larger opening when compared to f 4, 5.6, 8 or greater. This can be better understood with the help of an image.
Aperture is also used to control depth of field
Smaller f no. = shallow depth of field (Blur background)
Larger f no. = sharper depth of field (Sharper background)
Shutter is the mechanism by which the time of light going into the camera is controlled. It is placed just before the Negative film or the Electronic image sensor. Shutter works with two curtains, the first one goes up and then second will follow that depending upon camera shutter speed.
Shutter speed is also used to show the moment of subject in a photo.
Higher the shutter speed = Motion freeze
Lower the shutter speed = Motion live
ISO. After many innovations took place and the negative system was more developed the concept of film speed was also came into trend. The film speed was denoted by ASA or ISO both the terms were used in traditional photography films but now is digital era ISO is used only. ASA or ISO denotes the ability of a film to capture the light faster or slower. Films are available from ISO 50 to ISO 400 in the market. These are used as per requirement of the light where a photograph will be taken or a ISO100 or ISO200 film can be purchased to solve all the purpose and rest will be controlled with shutter speed and aperture.
So these three factors are very important to take a perfect exposure of a photograph or the exposure can be controlled with these free factors. a image will be shown describing the relationship between Aperture, Shutter and ISO.
To shoot a stunning image we are to master this combination of these three basic factors of photography. So Start using the Creative Modes on your Camera Dial which we will explain shortly.
You now able to understand the basic terms used in photography and familiar to their function also, Now we will guide you in near future posts to use the camera to take stunning photographs.